How to Make 3 Baby Cards in Canva with Clipart (Perfect for Printable Shops)
Baby cards are one of the easiest digital products to make and sell. They’re small, simple, and always in demand—new babies and baby showers don’t take a day off. With Canva and cute clipart, you can turn beginner-friendly designs into products that sell on Etsy, Shopify, or your own store.
In this tutorial, you’ll learn how to make three baby cards in Canva: a cloud-themed card, a basket card with a bow, and a dreamy starry-night card. You’ll use easy Canva tools like Group, Position, Layers, Shadows, Filters, and Transparency to make them look polished without feeling overwhelming.
The clipart shown in the video comes from the joining bonus inside the Clipart to Cash Membership. If you’re just getting started, you can also grab a free pack with 10 clipart pieces, a custom GPT, and a niche guide right here.
Here are the card themes we will build:
• Welcome to the world little one (soft cloud border)
• Sweet baby shower wishes (basket with bow)
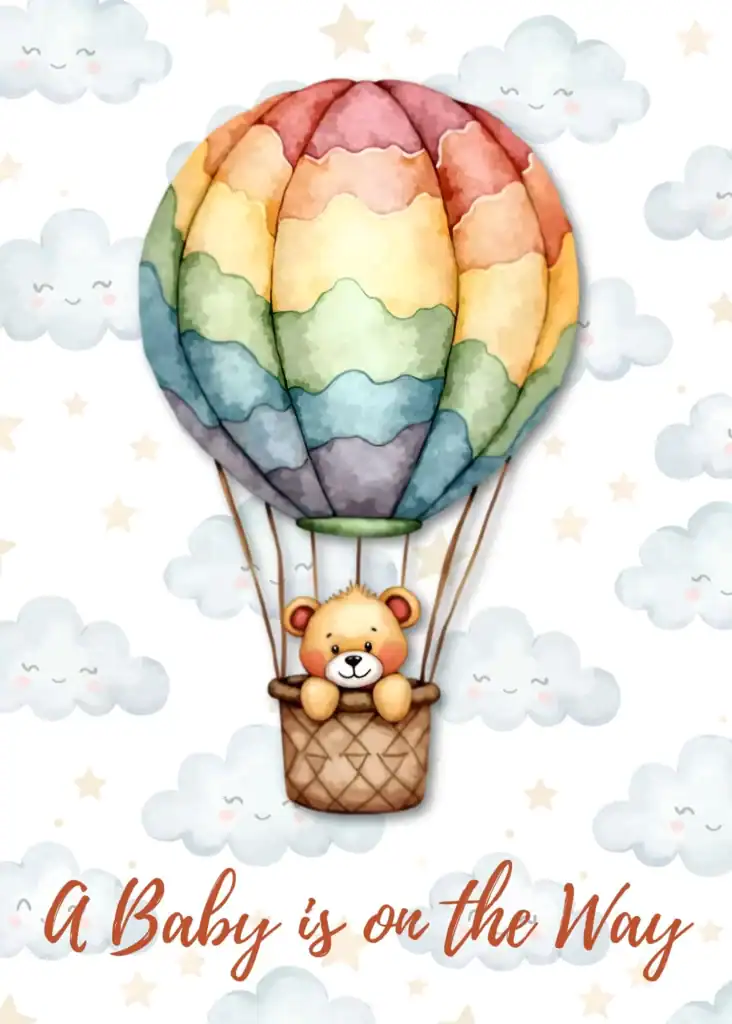
• Baby is on the way (starry sky and clouds)
You can watch the YouTube Video right here:
Card 1: Fluffy Cloud Border for “Welcome to the World Little One”
This first design is soft, simple, and perfect for printable baby cards. You’ll create a cloud border along the bottom, add a centered focal cloud, and finish with a gentle blue wash background.

Step 1: Build the Cloud Border
Start with your cloud clipart and use it to create a soft border along the bottom.
• Resize the cloud so it sits nicely across the bottom without being too tall.
• Copy/paste a few duplicates and line them up along the edge.
• Slightly vary the heights so the border looks natural and not perfectly straight.
• If you can’t click the right cloud, open Position > Layers and select it from the list.
• Select all clouds and Group them so the border moves as one piece.
Step 2: Add the Main Cloud + Greeting
• Bring in your main cloud and center it above the border.
• Add your text: Welcome to the world little one.
• Choose a soft handwriting font and increase the size so it feels like the focal point.
• Tighten the line spacing and leave breathing room at the top and sides for a clean layout.
Step 3: Add the Soft Blue Wash Background
• Search “blue wash” in Elements and choose a light, free option.
• Resize it to cover the full card and send it to the back.
• Lower the Transparency until the color becomes a subtle hint behind the design, not a distraction.
Quick check:
✔ Text centered
✔ Soft, even margins
✔ Background gentle and not overpowering
You now have a polished, printable baby card that looks much harder than it is.
Card 2: “Sweet Baby Shower Wishes” with Basket and Bow
This design layers a basket, bow, and soft foliage to create a warm baby-shower card with a gentle yellow wash background.

Step 1: Build the Basket + Bow Focal Point
- Place your basket clipart on the canvas.
- Add the bow, resize it, and center it at the top of the basket.
- Add a soft Drop Shadow to the bow to give it depth (keep the shadow subtle).
- Group the basket + bow so they move together.
Step 2: Add the Bear and Balloons
- Position the bear inside the basket so it sits naturally.
- Add the heart balloons above the bear.
- Adjust their size and tilt until they feel balanced and playful.
- If needed, add a very light Drop Shadow to the bear or balloons so they stand out without overpowering the soft look.
Step 3: Add the “Sweet Baby Shower Wishes” Text
- Add your text across the top of the card.
- Choose a soft, modern script or playful handwritten font.
- Increase the font size until it spans the design without crowding the sides.
- Make sure there’s comfy breathing room above the text and between the text and balloons.
Step 4: Add the Soft Yellow Wash Background
- Search “yellow wash” in Canva’s Elements and select a light, free watercolor option.
- Resize it to cover the entire canvas.
- Lower Transparency so the wash stays subtle and doesn’t compete with the artwork.
Final check:
✔ Text spaced well
✔ Balloons balanced above the bear
✔ Background soft and even
You now have a warm, printable baby-shower card that’s shop-ready.
Card 3: Rainbow Hot-Air Balloon for “A Baby Is on the Way”
This card uses a dreamy cloud-and-star background with a colorful hot-air balloon and bear as the main focal point. It’s soft, whimsical, and perfect for baby announcements.
Step 1: Build the Cloud + Star Background
- Add your cloud and star pattern to the canvas.
- Resize it to cover the entire card — you want a soft repeating pattern that feels airy and light.
- Lower the Transparency slightly so the background doesn’t compete with the balloon.
Keep a clean space at the bottom for your text.
Tip: If your clouds come as separate clipart pieces, place several across the canvas, vary their spacing, and group them so the background acts as one layer.
Step 2: Add the Hot-Air Balloon Focal Point
- Bring in your rainbow hot-air balloon and position it in the center.
- Add the bear in the basket underneath and adjust so it sits naturally.
- Resize the balloon until it dominates the center without touching the edges.
- Add a very soft Drop Shadow if you want a little depth, but keep it subtle so the look stays dreamy.
Step 3: Add the “A Baby Is on the Way” Text
- Add your text at the bottom of the card.
- Choose a script or handwritten font that feels warm and celebratory.
- Increase the size until it’s readable but not touching the edges.
- For color:
- Pick a tone from the balloon (a warm peach, tan, or soft rust works beautifully).
- Darken it slightly so the text pops while staying on palette.
Spacing check:
✔ Space under the balloon
✔ Text centered
✔ Top-to-bottom balance feels even
Pro Canva Tips That Make Your Baby Cards Shine
If you want to keep improving your designs as you create more baby cards (or any printable products), these quick Canva habits make everything easier and more polished:
- Group often so borders, backgrounds, and focal images move together without shifting your layout.
- Use Position + Layers to grab tricky elements and control which pieces sit in front or behind.
- Play with Transparency, Shadows, and Filters to add soft dimension without making the design feel heavy.
- Adjust your line spacing and margins so your text has breathing room and looks clean in a shop listing.
And because Canva’s clipart rules can get confusing when you’re selling finished products, it helps to work with artwork you own. All the clipart used in these tutorials comes from the Clipart to Cash Membership joining bonus, so you can reuse it confidently across multiple products.
If you want help choosing profitable themes, naming your products, or coming up with design ideas, grab the free clipart pack, custom GPT, and niche guide. It’s a simple way to start creating designs that already have demand behind them.
Final Thoughts: Let Your Creativity Shine, Even Before You Feel Ready
You don’t need a huge catalog of products to get started. These three simple baby cards show exactly how far you can go with clipart, a few Canva tools, and a willingness to try. They’re small, fast to make, and the perfect first step toward a passive-income shop that grows over time.
You’ve learned how to build borders, layer clipart, add soft watercolor washes, center your layouts, and use shadows and transparency to create depth — all with tools already inside Canva.
The next move is simple: open Canva, pick one card style from this guide, and create your version today.
Your creativity shines when you take action, not when you wait to feel ready.